Testing your backend integration with ease
Different ways for mocking yout data
While working on a client application, you may be wondering, what is the most effective way to test (or even to develop) your networking layer without trying to alter the backend in order to replicate certain scenarios.
Working with the backend is time consuming. Real requests take time, you may have to follow certain steps for every action you are trying to test and in many cases, you may not even have the flexibility to reproduce certain states in your backed.
So what can you do to make your life easier? Let’s have a look at some of the options, here is a breakdown of what will we look at:
- Mocking your data
- Mocking your network layer
- Setting up a local dev server manually
- Using a mock server application
Note, that while the code in this article is written for iOS, the core principles are universal and can be applicable to most programming languages and environments
Mocking your data
One of the easiest options is to mock your data. The way you do this is highly dependent on you application’s code, but generally you would want your data provider to be easily swappable. This way, while developing (or in your automated tests) you can replace it with something that returns mock data instead of reaching out to your backend.
One way to do this is the following:
// 1. Create a protocol for your data provider:

protocol UserProvider {
     func getUsers() async -> [User]
}

// 2. Next is to create your real data provider and a mock version:

class ApiUserProvider: UserProvider {
    func getUsers() async -> [User] {
        return await someRequest()
    }
}

class DummyUserProvider: UserProvider {
    func getUsers() async -> [User] {
        return [User(), User()]
    }
}

// 3. Now in your client code, you can use the type UserProvider instead of ApiUserProvider

class SomeClient {
     init(userProvider: UserProvider) { /* …. */ }
 }
This approach makes your code suitable for unit testing as it removes all the uncontrollable factors from the unit you are testing. One downside of it is that while developing, you will not see all the edge cases that comes with real networking or that sometimes you can end up over-engineering your code just to abstract out every piece of the networking layer
Mocking your network layer
The next option is to mock your network layer. In this case you are altering how your networking client behaves in certain situations. To do this on iOS, you can create a custom type conforming the URLProtocol protocol. This protocol allows you to stop a URLSession from making a request and instead return any data you want it to return.
To use it, create your protocol, then set it like this:
let configuration: URLSessionConfiguration = .ephemeral
configuration.protocolClasses = [YourProtocolType.self]
let session = URLSession(configuration: configuration)
This approach will still eliminate the networking from your application but is one step closer to a hassle free solution where you are not required to over engineer your code
Setting up a local deserver manually
If you want to see how your app really behaves while communicating over the network while still having full control over the API you are talking to, one of your best options is to set up a local server. You can do this in many ways. One of them is using Node.js with express:
// 1. Create a node project
// 2. Add the following code to your index.js

const express = require('express')
const app = express()
const port = 3000

app.get('/', (req, res) => {
  res.send('Hello World!')
})

app.listen(port, () => {
  console.log(`Example app listening on port ${port}`)
})
This is a quick and easy solution. It is fully customisable and doesn’t eliminate any of the nuances of having real networking in your application. The only downside is having to code a backend for your app. Even if this backend is a development one with hardcoded data and simplified logic, you still have to work on it and as you start adding more advanced features, like authentication or file responses, it quickly becomes a rather tedious task. This is where our last option comes in play
Using a mock server application
By using an app that allows you to set up mock servers, you get the best parts of the previous solution while leaving the implementation to the developers of the app. One such app is MockaMatic.
To set up a mock server with MockaMatic, follow these few easy steps:
0. Install the app
MockaMatic can be installed from the Mac and iOS App stores
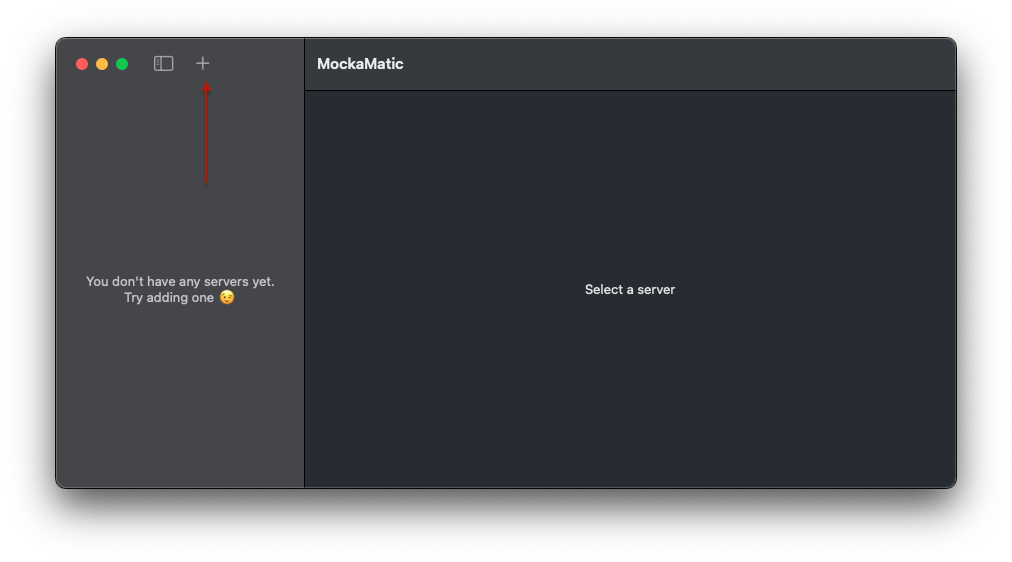
1. Createa a mock server
Once the app is installed, click the plus button or press cmd+n on the Mac to create a new mock server
Enter a name for your server and adjust the port if needed
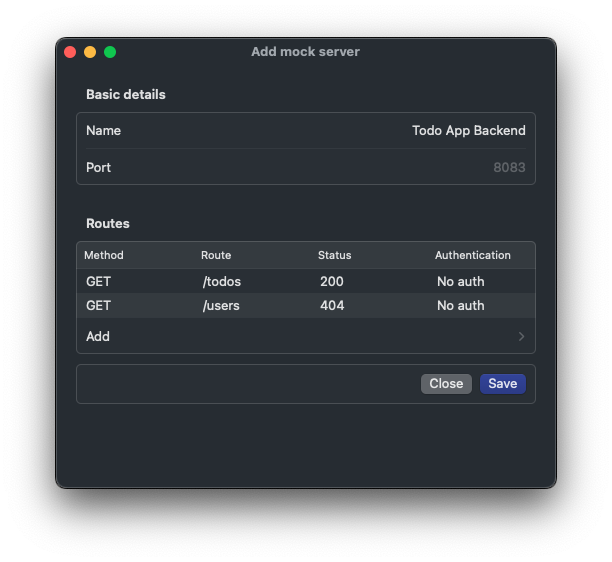
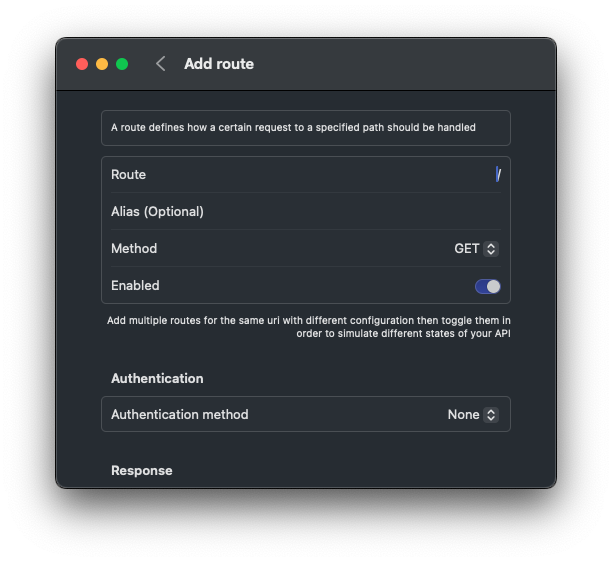
2. Add the routes
Add any number of routes you would like to mock. For each route you can specify a path, the request method it is listening to and what the response’s status code and body to be. You can also set up an authentication method so the route will automatically reject any request that doesn’t match a certain criteria
3. Once you saved your server, you can start it by pressing the play button
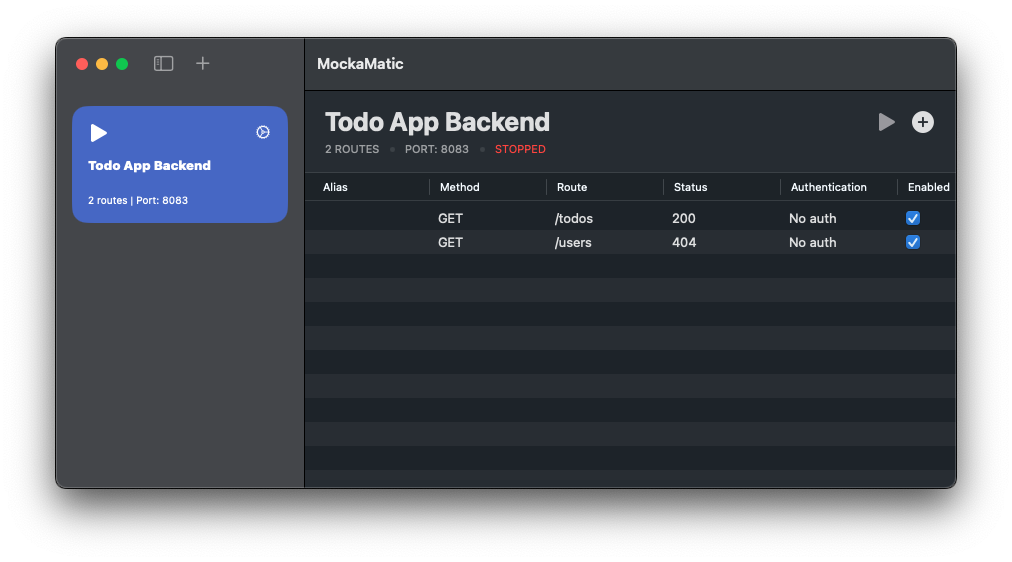
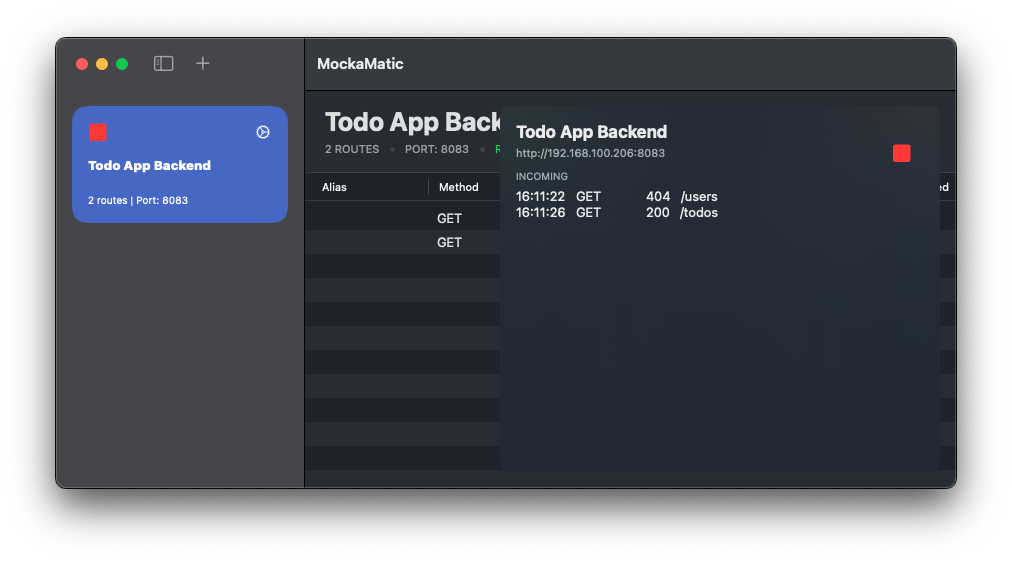
4. Review your requests
While the server is running, you can keep an eye on the incoming requests using the server status view in the app or in the status bar area in case you are using MockaMatic on the Mac
Latest articles
Here are some more articles that may interest you. Check them out!
The TimelineView
published on November 2, 2025
SwiftUILearn how to use SwiftUI’s TimelineView to build time‑based animations. This article explains scheduler options, shows practical examples (pauseable clock, smooth minute‑progress ring with hue shifts and tick marks), and helps you choose the right schedule for smooth or precise updates.
Read moreContainer Relative Frame
published on September 18, 2025
SwiftUILearn how to use the containerRelativeFrame modifier in SwiftUI to create proportional layouts. This article explains both variants of the modifier, how containers are determined, and provides practical examples for building flexible, responsive UIs.
Read moreFoundation Models
published on October 8, 2025
SwiftAILearn how to use Apple’s foundation models to run large language models locally on iOS. This article covers chat, streaming responses, structured data generation, and custom tools, helping you build secure and responsive AI features without relying on the cloud.
Read more