Animate your drawings with SwiftUI
How to animate Shapes and Canvases
In the previous article, we have explored the different methods for drawing in SwiftUI. As a recap, Paths can be seen as the basic building blocks of the drawing system. Shapes offer reusability and resizeability to Paths and finally the Canvas can be used for a fully featured drawing component.
In this article we are going to explore how to make these drawings more interactive with animations. We will start with Shapes as paths on their own are not animatable. Then we will see how to achieve complex animations with canvases. At the end of this article, we will have the colored fan created in the previous article add and remove new fan blades with animation.
The code snippets in this article may be a bit more complex, every view presented here can be found on my GitHub
Animation in SwiftUI
In SwiftUI, the animation of a view is based on the Animatable protocol and the animatableData. In a nutshell, when a property of a view is changed using an animation, SwiftUI interpolates between the source and target value of the view's property. These values are received via the animatableData property of a view which is also the only requirement of the Animatable protocol. This may seem a bit confusing at first but will make a lot of sense in the following example.
Animating shapes
As I've hinted already in the introduction, animating Paths and Shapes go together tightly so we can not discuss the two independently like in the previous article.
Let's create a shape
For the purpose of this article, let's create a simple shape that draws n number of lines from the center outwards, at equal distances from each other.
struct AnimatedLines: Shape {
    var lines: Int

    func path(in rect: CGRect) -> Path {
        var path = Path()

        let pivot = CGPoint(x: rect.midX, y: rect.midY)
        // Divide the distance equally
        let sideOffsetAngle = 360 / lines

        for i in 0..<lines {
            // Calcualte the angle of the current line and
            let angle = Angle.degrees(Double(i * sideOffsetAngle))
            // Create rotation transform
            let transform = CGAffineTransform(translationX: pivot.x, y: pivot.y)
                .rotated(by: angle.radians)
                .translatedBy(x: -pivot.x, y: -pivot.y)

            // Create the end point of a side then rotate it around the center point
            let targetPoint = CGPoint(x: rect.midX, y: rect.midY - rect.height / 4)
                .applying(transform)
            path.move(to: pivot)
            path.addLine(to: targetPoint)
        }

        return path
    }
}
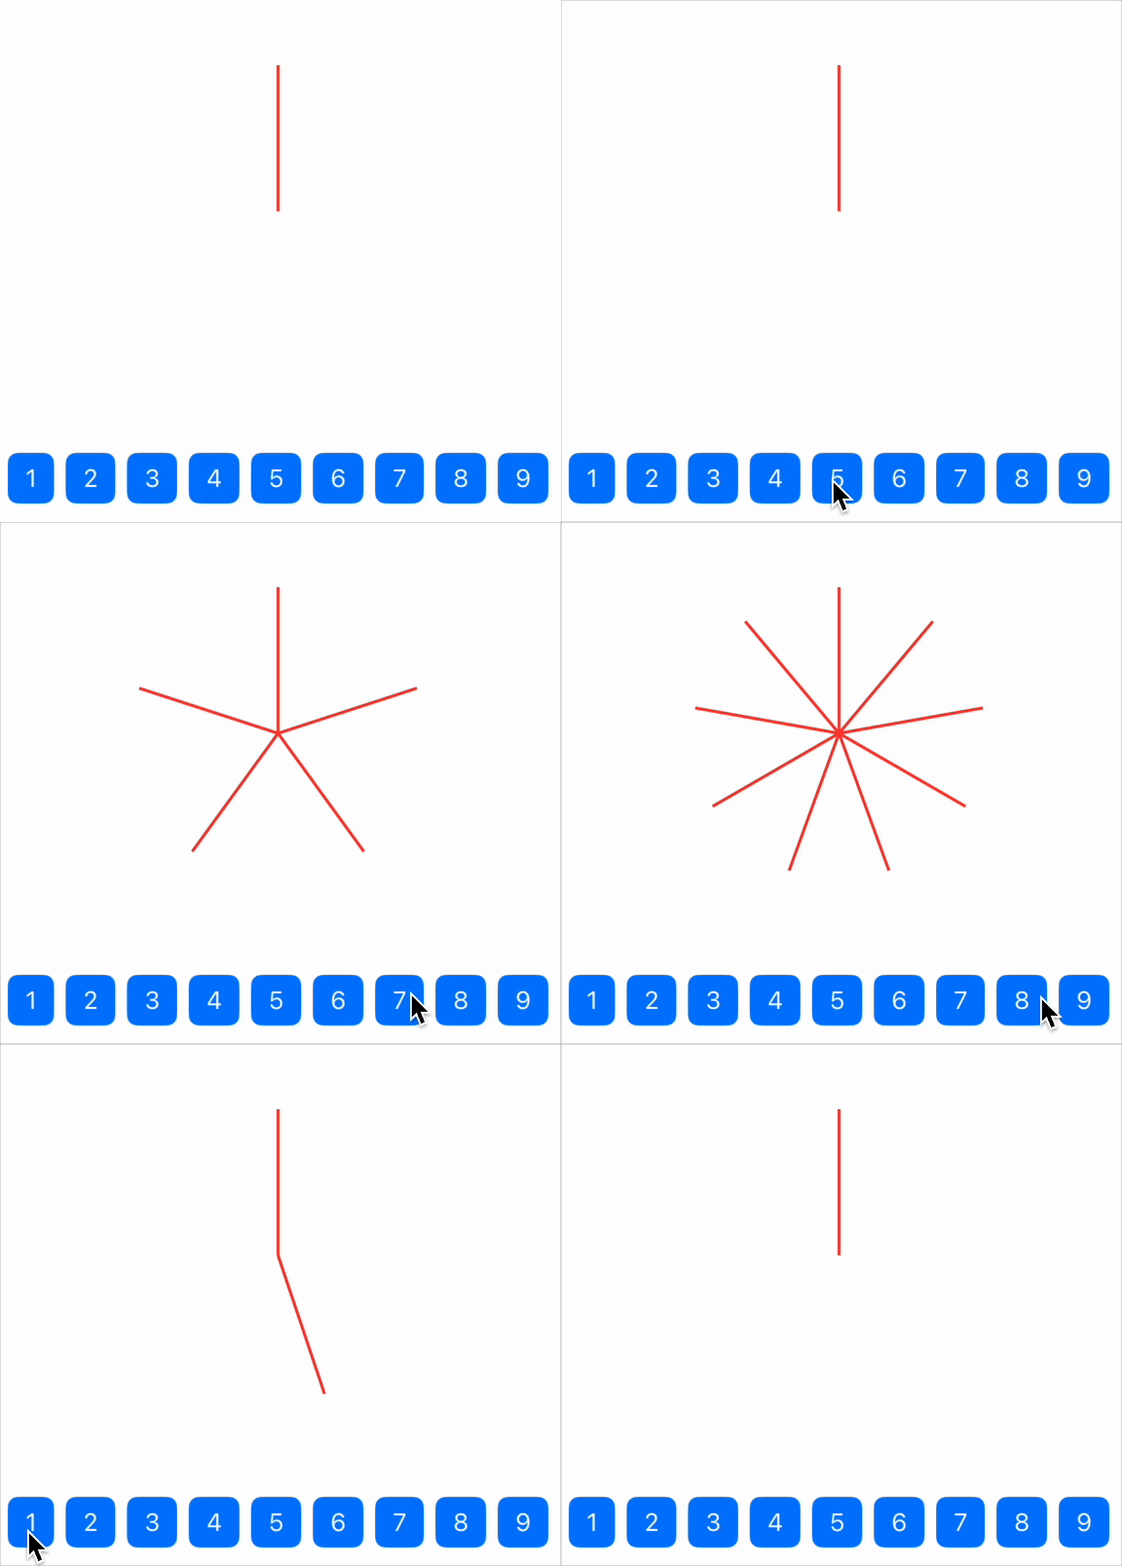
Try to preview this shape. You will see something like this:

Now go ahead and try to change the number of lines inside a withAnimation block. You may be expecting that at least the sides fade in and out but no, nothing like that happens. That is because even though a Shape is Animatable by default, it's animatableData returns a EmptyAnimatableData that signals for the system not to anymate anything. So let's see how to solve this
Make it move!
First, add a new property to the AnimatedLines shape
var animatableData: Double {
    get { lines }
    set { self.lines = newValue }
}
For this to work, you will also have to change the lines property to a Double. Next we will need some changes to the path(in:) function. The new function body looks like this:
var path = Path()

let linesWholePart = Int(lines)
let linesProgress = lines - Double(linesWholePart)

let lines = linesWholePart + (linesProgress == 0 ? 0 : 1)
let pivot = CGPoint(x: rect.midX, y: rect.midY)

for i in 0..<lines {
    // Calculate the transform for the current index
    let finalProgress = (linesProgress == 0.0 ? 1.0 : linesProgress)
    let angle = angleWithProgress(line: i,
                                    totalLines: lines,
                                    progress: finalProgress)

    let transform = CGAffineTransform(translationX: pivot.x, y: pivot.y)
        .rotated(by: angle.radians)
        .translatedBy(x: -pivot.x, y: -pivot.y)

    // Create the end point of a side then rotate it around the center point based on the current index
    let targetPoint = CGPoint(x: rect.midX, y: rect.midY - rect.height / 4)
        .applying(transform)
    path.move(to: pivot)
    path.addLine(to: targetPoint)
}

return path
The angleWithProgress function has the following implementation:
private func angleWithProgress(line: Int, totalLines: Int, progress: Double) -> Angle {
    if line == 0 { // First line never moves
        return .zero
    } else if line == totalLines - 1 { // Last lines goes from 0 to the target angle
        return angleFor(line: line,
                        outOf: totalLines,
                        withProgress: progress)
    } else { // Every other line goes from their previous position to the new position. They don't start form 0 again
        let previous = angleFor(line: line, outOf: totalLines - 1)
        let next = angleFor(line: line, outOf: totalLines)

        return previous + (next - previous) * progress
    }
}

private func angleFor(line: Int, outOf lines: Int, withProgress progress: Double = 1) -> Angle {
    let sideOffsetAngle = 360 / lines
    return Angle.degrees(Double((lines - line) * sideOffsetAngle) * progress)
}
As you can see, we are using the decimal part of the lines property to animate between the start and end angle of each line.
💡 Note: Swift will iterate through every whole number from the start to the end value not only fractions between 0 and 1. So if you change the
linesproperty from 1 to 3, SwiftUI will go through 1..1.5...2..2.5..3.The exact resolution of the values depends on many factors, like the animation duration.
If you preview the shape now, and change the number of lines, you will see the following results

Let's do some clean-up
It's important to note that you are not limited to assigning the animatableData to a property and read it back. The animation system in SwiftUI really only cares about that property so you can produce it's value any way you want. Let's say that you don't like how your AnimatedLines init now takes a double when you are only ever supposed to provide Int values to it. Let's see how that is achieved
First, let's change up how the animatableData property is handled
struct AnimatedLines: Shape {
    var lines: Int
    private var progress: Double = 0

    init(lines: Int) {
        self.lines = lines
    }

    var animatableData: Double {
        get {
            Double(lines) + progress
        }
        set {
            self.lines = Int(newValue)
            self.progress = newValue - Double(self.lines)
        }
    }

    // ...
}
As you can see, the Shape is now initialized with an Int and the animatableData divides any received value into an integer and a fraction representing the current number of lines and the current progress of the animation.
In fact, this change also simplifies the path generation a little bit. The new version looks like this
var path = Path()

let lines = lines + (progress == 0 ? 0 : 1)
let pivot = CGPoint(x: rect.midX, y: rect.midY)

for i in 0..<lines {
    // Calculate the transform for the current index
    let finalProgress = (progress == 0.0 ? 1.0 : progress)
    let angle = angleWithProgress(line: i,
                                    totalLines: lines,
                                    progress: finalProgress)

    let transform = CGAffineTransform(translationX: pivot.x, y: pivot.y)
        .rotated(by: angle.radians)
        .translatedBy(x: -pivot.x, y: -pivot.y)

    // Create the end point of a side then rotate it around the center point based on the current index
    let targetPoint = CGPoint(x: rect.midX, y: rect.midY - rect.height / 4)
        .applying(transform)
    path.move(to: pivot)
    path.addLine(to: targetPoint)
}

return path
When previewing the Shape, you will see that nothing really changed, but on the API level AnimatedLines is a lot nicer now!
What about canvases?
Animating a canvas works in a similar fashion to the previous animation. Here is a quick brakedown:
- We will create an animatable view
- We will draw our graphics
- We will use the same approach as in the previous example to animate the graphics
In this example, we are going to make the colored fan from the previous article open and close with animation. I will not go into details about how to draw the fan itself as it was discuessed in that article.
Let's create the fan
This stage is mostly about combining our animated lines with the colored fan. Let's see how.
First, we need to create an Animatable view since views are not animatable by default. We will also add the same animatableData and its logic as before
struct AnimatedFan: View, @preconcurrency Animatable {
    var blades: Int
    private var progress: Double
    private let colors: [Color] = [.red, .blue, .green, .yellow, .orange, .purple, .pink, .gray, .cyan, .brown]

    var animatableData: Double {
        get {
            Double(blades) + progress
        }
        set {
            self.blades = Int(newValue)
            self.progress = newValue - Double(self.blades)
        }
    }

    init(blades: Int) {
        self.blades = blades
        self.progress = 0
    }

    // .. view body
}
Now let's implement the view body.
Canvas { context, size in
    let rect = CGRect(origin: .zero,
                        size: size)
    let pivot = CGPoint(x: rect.midX, y: rect.midY)
    let blades = blades + (progress == 0 ? 0 : 1)

    let bladeWidth = rect.width / 3
    let bladeHeight = rect.height / 2
    let finalProgress = (progress == 0.0 ? 1.0 : progress)

    for i in 0..<blades {
        let angle = angleWithProgress(line: i,
                                        totalLines: blades,
                                        progress: finalProgress)
        let scale = scale(for: i, of: blades, progress: finalProgress)
        let color = colors[i % colors.count]
        let blade = FanBlade(pivot: pivot,
                                angle: angle,
                                bladeWidth: bladeWidth,
                                bladeHeight: bladeHeight,
                                scale: scale).path(in: rect)
        context.stroke(blade, with: .color(color.opacity(scale)))
        context.fill(blade, with: .color(color.opacity(0.6 * scale)))
    }
}
A you can see this code is the combination of the colored fan from the previous article and the animated lines from this article. The only difference is the scale factor we use both for scaling and for fading in and out. This is added so the blades don't just appear suddenly out of nowhere. The implementation of that function is pretty simple:
private func scale(for blade: Int, of blades: Int, progress: Double) -> Double {
    if blade == blades - 1 {
        // We want to sale up to 100% by the time the animation progress reaches 40%
        return min(progress / 0.4, 1)
    } else {
        return 1
    }
}
I will leave it to you to modify the FanBlade shape from the previous article but to give you a hint, this is how you will scale the path:
let scaledArcRadius = scale * arcRadius
let scaledSideWidth = scale * bladeSideWidth
let yOffset = (arcRadius + bladeSideWidth) * (1 - scale)
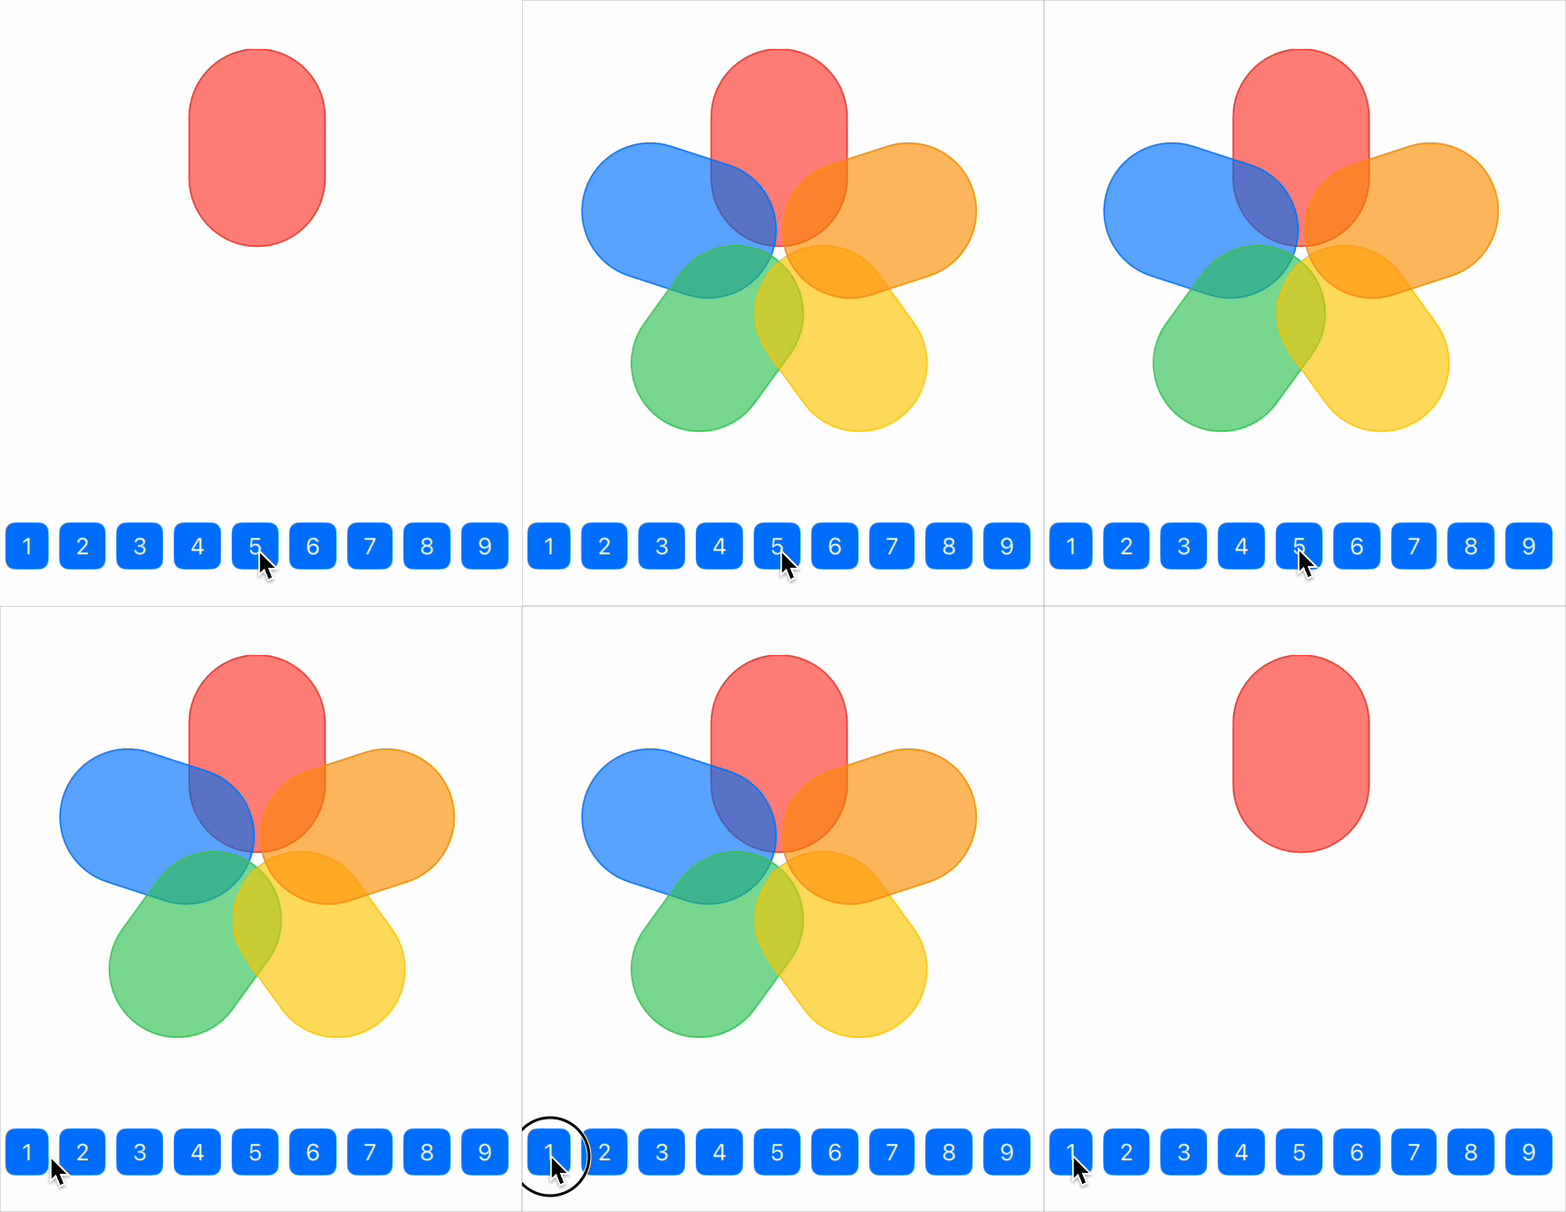
And that is it. As you can see, animating a canvas is as easy as wrapping it into an animatable view. Let's preview our code, the results should look similar to this:

We can do better
Our fan already looks nice, but I'm sure that we can do better. We will do 2 improvments:
- Add some bouncy animation
- Instead of scaling up the blades in a linear fashion, we will add some bounce to it
To make the animations bouncy, we need to make two small changes. First, edit the function called angleWithProgress and make the following changes
if line == 0  && lines > 1 { // added `lines > 1`
    return .zero
}
This snippet was meant to remove any weird jumps for the first blade, but when we make it bouncy actually we want weird jumps for the first blade as well.
The second update is actually at the call site. Replace your withAnimation call with this
withAnimation(.bouncy(duration: 1, extraBounce: -0.1)) {
    numberOfBlades = index
}
You can experiment with the duration and extraBounce parameters but I will go with these for now.
To update scaling with a bit of bounce, change the scale function with this new implementation
private func scale(for blade: Int,
                       of blades: Int,
                       progress: Double) -> Double {
    if blade == blades - 1 {
        if progress <= 0.4 {
            return min(progress / 0.4, 1)
        } else if progress <= 0.8 {
            let overshoot = 1.2// Overshoot factor
            let t = (progress - 0.4) / 0.4 // Normalize between 0 and 1
            return 1 + (overshoot - 1) * sin(t * .pi)
        } else {
            return 1
        }
    } else {
        return 1
    }
}
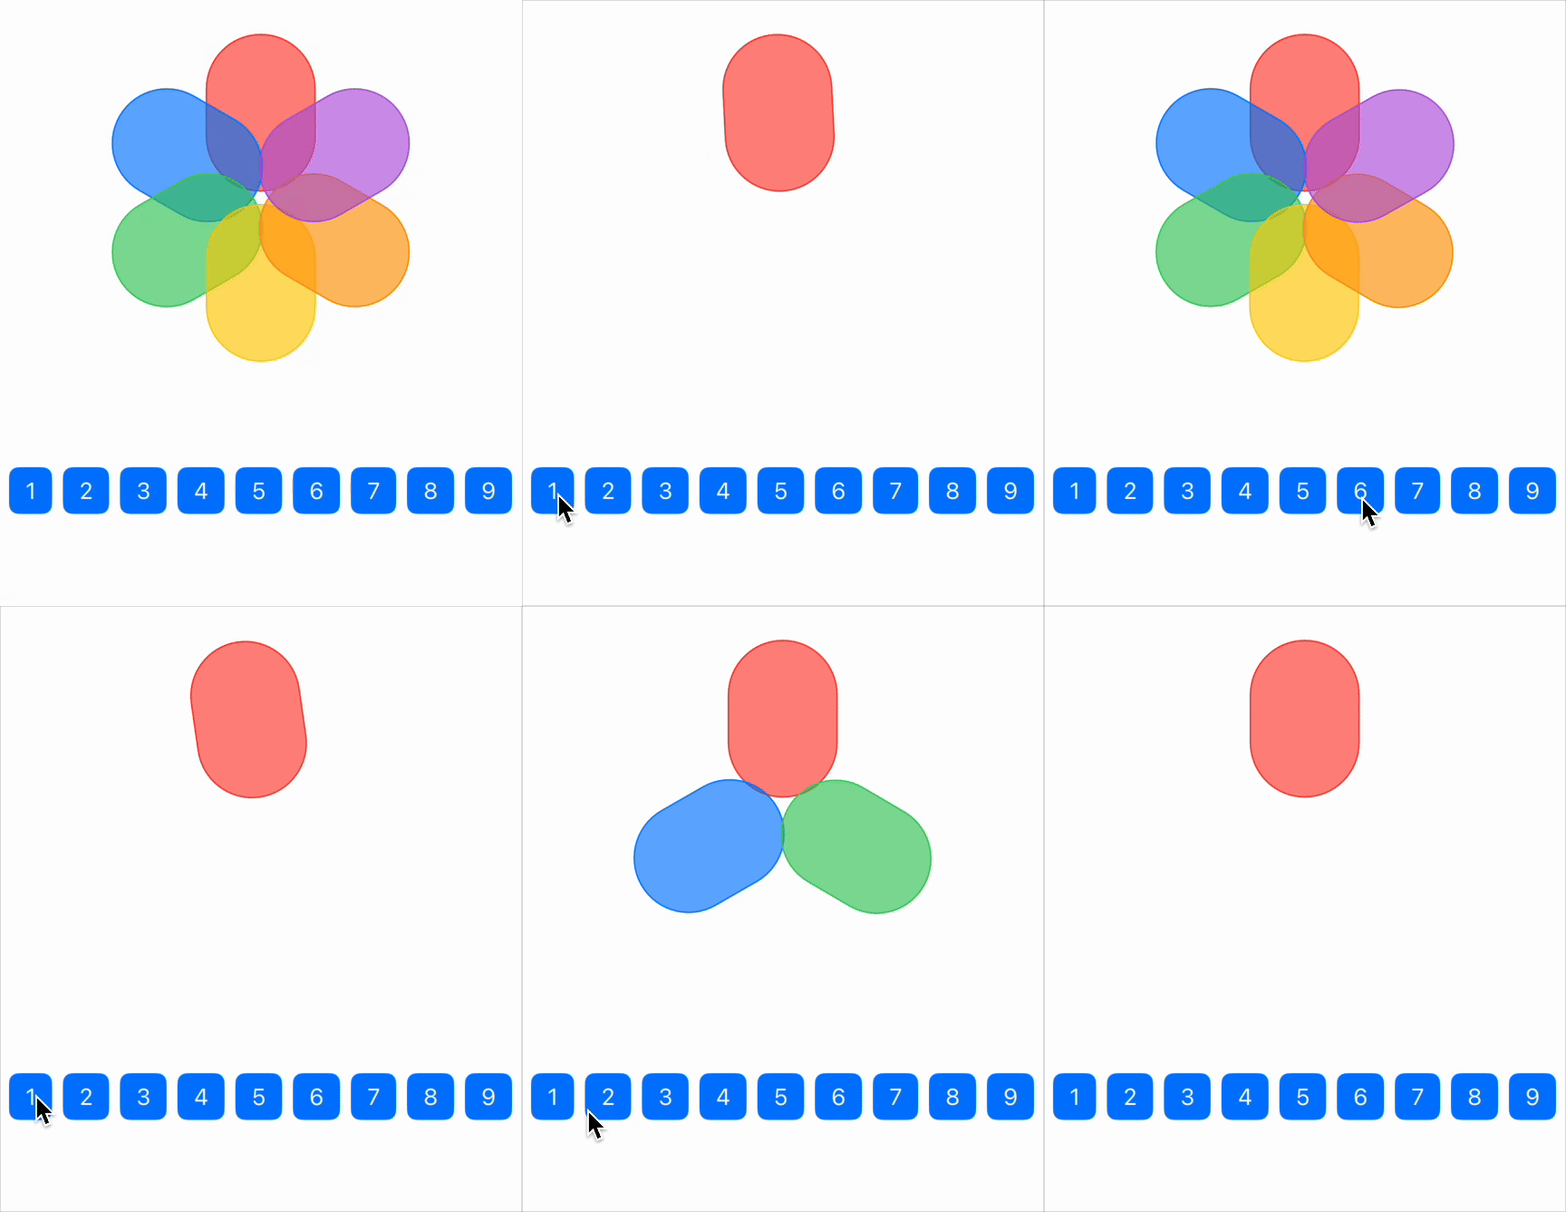
The final result looks like this:

💡 Note: For the animation to not overflow the canvas, you will need to update the drawing logic to add some padding. Take this as a challange!
Conclusion
As we have seen, animating a path or a canvas in SwiftUI is nothing but working with a series of values provided by the system. This fits well with SwiftUI's declarative nature and makes even complex animations a lot simpler to work with.
Related articles
Here are some more articles that may interest you. Check them out!
The TimelineView
published on November 2, 2025
SwiftUILearn how to use SwiftUI’s TimelineView to build time‑based animations. This article explains scheduler options, shows practical examples (pauseable clock, smooth minute‑progress ring with hue shifts and tick marks), and helps you choose the right schedule for smooth or precise updates.
Read moreContainer Relative Frame
published on September 18, 2025
SwiftUILearn how to use the containerRelativeFrame modifier in SwiftUI to create proportional layouts. This article explains both variants of the modifier, how containers are determined, and provides practical examples for building flexible, responsive UIs.
Read moreMatched Transitions in SwiftUI
published on September 23, 2025
SwiftSwiftUIAnimationsLearn how to use matchedGeometryEffect and navigationTransition in SwiftUI to create smooth, visually engaging transitions between views and screens. This article covers practical examples for synchronizing view geometry and implementing the new zoom navigation transition, helping you build more dynamic and polished UIs.
Read more