Working with CoreBluetooth
Bluetooth communication made easy
Bluetooth has become an essential technology for connecting devices and enabling seamless communication between them. On iOS, the CoreBluetooth framework provides a powerful and flexible way to interact with Bluetooth Low Energy (BLE) peripherals. Whether you’re building apps that connect to wearables, sensors, or other smart devices, CoreBluetooth gives you the tools to discover, connect, and exchange data securely and efficiently. In this article, we’ll explore the basics of working with CoreBluetooth, covering how to scan for devices, establish connections, and manage data transfers in your Swift project.
Main concepts
Central and peripheral
In this article we are going to reference two types of devices. A central and peripherals. The central is typically a phone or computer and as it's name suggest, it's main role is to connect to peripherals and initiate communication with them by reading or writing their data.
A peripheral is usually a gadget, a smart device or an IOT accessory and it's role is to provide meaningful information to the central device.
Service and characteristics
A bluetooth peripheral typically advertises one or more services, each having one or more characteristics. Communication between devices happens on the characteristics level while a services serves as a way of grouping and identifying characteristics.
For example, an ambient sensor could have the following services and characteristics:
- Ambient services:
- Humidity (characteristic)
- Temperature (characteristic)
- Device information service:
- Serial number (characteristic)
- Manufacturer (characteristic)
Let's build an example
The easiest way to understand how core bluetooth works is to create an example project. I've decided to implement a simple example that mimics an ambient sensor with a temperature characteristics, and an on-off state characteristics. For the sake of simplicity, both will be inside the same service.
For the sake of this example, to demonstrate both sides using CoreBluetooth, I'm going to implement both the central and the peripheral in an iOS application. To run the example, you will need two devices that can talk to each other.
💡 Creating the UI of this example app is out of scope for this article, but you should be up and running in no time with SwiftUI!
Central
Let's see how the central is built. First, let's create a class to handle the bluetooth communication. This class will need to conform to the NSObjectProtocol in order to be able to implement our delegate protocols. The easiest way of achieving this is to extend the NSObject class.
class BluetoothManager: NSObject {
   // 1.
   var centralManager: CBCentralManager!
   // 2.
   var discoveredPeripheral: CBPeripheral?
   var discoveredTemperatureCharacteristic: CBCharacteristic?
   var discoveredStateCharacteristic: CBCharacteristic?

   // 3.
   var currentTemperature: String = "-"

   // 4.
   let serviceUUID = CBUUID(string: "0000FFF0-0000-1000-8000-00805F9B34FB")
   let temperatureCharactersticUUID = CBUUID(string: "0000FFF1-0000-1000-8000-00805F9B34FB")
   let stateCharacteristicUUID = CBUUID(string: "0000FFF1-0000-1000-8000-00805F9B34FC")

   // 5.
   override init() {
      super.init()
      centralManager = CBCentralManager(delegate: self, queue: nil)
   }

    // ...
}
At the same time as you can see, we have defined some of the properties needed for this example.
- We need a central manager object to interact with the phones bluetooth
- We will store the discovered peripheral and it's characteristics for easier access, even though the characteristics can be accessed through the peripheral's
servicesproperty as well - This will hold the last state reported by the peripheral
- The services and characteristics are identified by unique identifiers in bluetooth devices. In our case, we are going to share these between the two example projects. When working with real bluetooth devices, you either have to discover these in some way or obtain them from the device's manufacturer
- Finally we can initialize the central manager, passing
selfas it's delegate
You may notice that the initialization part gives a compile error. That's because our object doesn't conform to the CBCentralManagerDelegate protocol yet. Let's fix that.
CBCentralManagerDelegate
extension BluetoothManager: CBCentralManagerDelegate {
   // ...
}
We will implement four methods here in this extension to handle different events in our bluetooth flow. The first one (and the only required one) is centralManagerDidUpdateState(_).
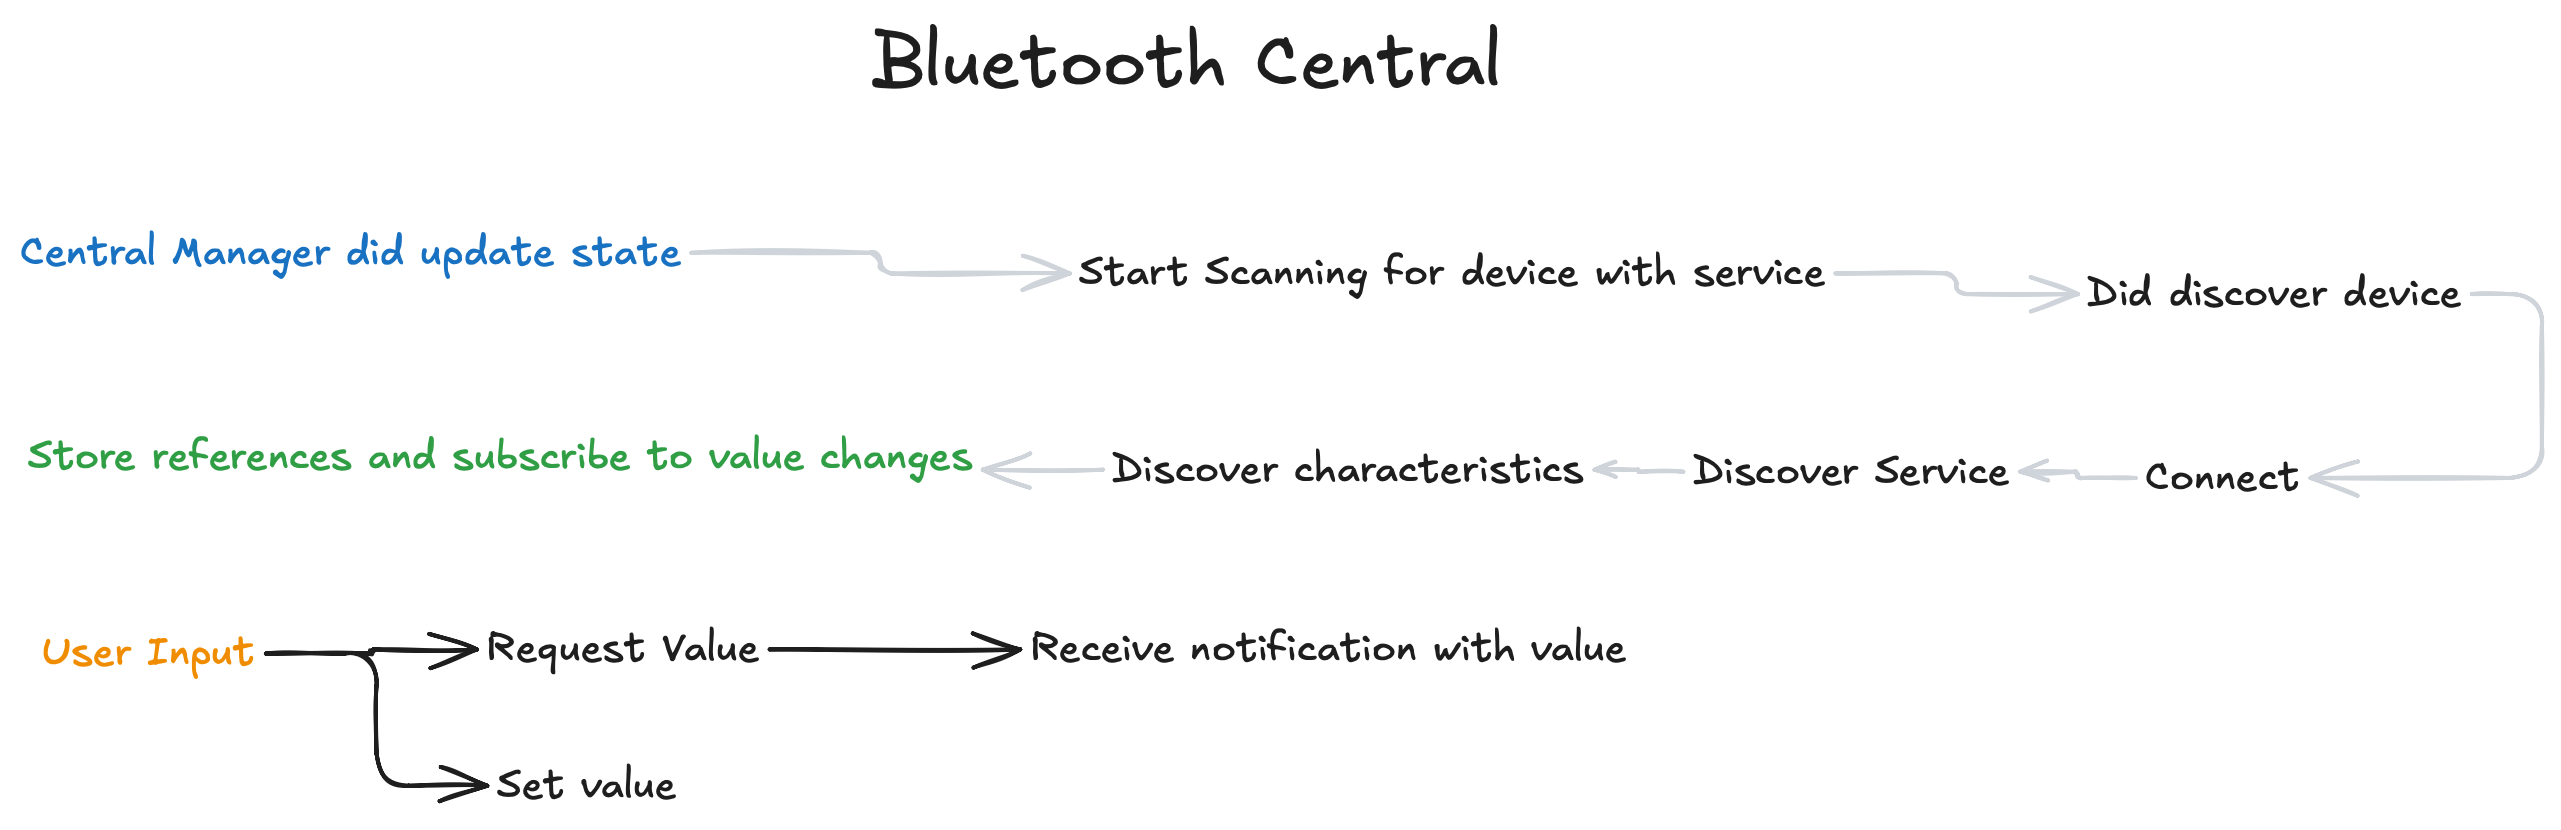
func centralManagerDidUpdateState(_ central: CBCentralManager) {
   if central.state == .poweredOn {
      central.scanForPeripherals(withServices: [serviceUUID])
   }
}
The central manager can have a couple of states but right now we are only interested in the .poweredOn state. This shows us that the user has turned on the Bluetooth of the phone. This delegate method is called every time the user toggles the bluetooth but also reports the initial state of it when the central manager is initialized.
💡 Note: You probably know that the user can turn off the bluetooth from the control center or the settings of the phone. The difference is that turning it off from the control center will disconnect devices but keep the bluetooth itself on, while turning it off from the settings shuts it down completely. Altought it is useful to know this, apple doesn't provide this information to us in code, all we know wether we can use the bluetooth or not.
As you can see, as soon as the bluetooth is available, we request the central manager to start scanning for new devices, but only for the ones advertising a specific service id (or multiple ones). Once central manager discovers a device, it calls it's delegate's didDiscover method. Let's implement it:
func centralManager(_ central: CBCentralManager,
                     didDiscover peripheral: CBPeripheral,
                     advertisementData: [String : Any],
                     rssi RSSI: NSNumber) {
   discoveredPeripheral = peripheral
   central.stopScan()
   central.connect(peripheral)
}
Once a device is discovered, we store a reference to it so we can use it later and ask the central manager to connect to the device right away. This is not mandatory, it would also be possible to prompt the user with a list of discovered devices and let them choose which one to connect to. Also note that it's s good practice to stop scanning for device as soon as we found the one we need in order to save resources.
💡 Note: We are not using the last two parameters of the method but these can also be useful in certain scenarios.
advertisementDataholds additional data provided by the peripheral (if any) andRSSI(Recieved Signal Strenght Indicator) shows the signal strength of the device
The next step is to handle a succesful connection.
func centralManager(_ central: CBCentralManager, didConnect peripheral: CBPeripheral) {
   peripheral.delegate = self
   peripheral.discoverServices([serviceUUID])
}
When the central establishes a connection to the peripheral, it notifies it's delegate with the above method. Here we can start discovering services. This step may seem redundant as we already know the service exists since we started scanning for the device based on that. However, we may have multiple services in a device and we may not want to list them all in the scanning phase. Accessing the service is only possible once it was discovered. Also note that the peripheral's delegate is set to self. That is because the rest of the flow will be handled by an other protocol's implementation. Before that however, let's see the last method implemented in this extension:
func centralManager(_ central: CBCentralManager,
                     didDisconnectPeripheral peripheral: CBPeripheral,
                     timestamp: CFAbsoluteTime,
                     isReconnecting: Bool,
                     error: (any Error)?) {
   discoveredPeripheral = nil
   discoveredTemperatureCharacteristic = nil
   discoveredStateCharacteristic = nil
}
When a device is discovered, you probably want to free up any references to it. Since we are only working with one device at a time, there is no need to verify the disconnected peripheral, we can simply set those references to nil.
CBPeripheralDelegate
The next step is to implement the Peripheral delegate.
extension BluetoothManager: CBPeripheralDelegate {
   // ...
}
Previously we asked the peripheral to discover the services we are interested in. When the task is done, the following method is called. This is a good place to access the peripheral's services array. Hopefully it contains all the services we needed. Since in this example we only have one service, that must be the one we requested so we can go ahead and request the discovery of our characteristics.
func peripheral(_ peripheral: CBPeripheral, didDiscoverServices error: (any Error)?) {
   if let services = peripheral.services {
      for service in services {
            peripheral.discoverCharacteristics([temperatureCharactersticUUID, stateCharacteristicUUID], for: service)
      }
   }
}
Similarly, we will be notified in the following delegate method once the characteristics are discovered. This method is called for every service we have requested discover for. We can iterate the discovered characteristics and handle them according to our needs. In our case, this means storing a reference to them and calling the setNotifyValue method for the temperature characteristics on the peripheral. This method subscribes the central for updates about the characteristic. Peripheral can update a value on request or whenever it want's to, but only for centrals subscribed to it.
func peripheral(_ peripheral: CBPeripheral, didDiscoverCharacteristicsFor service: CBService, error: (any Error)?) {
   if let characteristics = service.characteristics {
      for characteristic in characteristics {
            if characteristic.uuid == temperatureCharactersticUUID {
               peripheral.setNotifyValue(true, for: characteristic)
               discoveredTemperatureCharacteristic = characteristic
            } else if characteristic.uuid == stateCharacteristicUUID {
               discoveredStateCharacteristic = characteristic
            }
      }
   }
}
The last method remaining is the one handling incoming values. For this example, we are simply reading the value as a string and storing it in the local state variable
func peripheral(_ peripheral: CBPeripheral, didUpdateValueFor characteristic: CBCharacteristic, error: (any Error)?) {
   if characteristic.uuid == temperatureCharactersticUUID {
      if let value = characteristic.value, let message = String(data: value, encoding: .utf8) {
            currentTemperature = message
      }
   }
}
Reading and writing data
At this point, everything is set up, we have references to the most important properties of the peripheral, so all that's left is a way to initiate communication. We are going to implement two methods, one for requesting the current temperature and one for setting the state of the device:
class BluetoothManager: NSObject {
   // ...

   func requestTemperature() {
      if let discoveredPeripheral, let discoveredTemperatureCharacteristic {
         discoveredPeripheral.readValue(for: discoveredTemperatureCharacteristic)
      }
   }

   func setState(_ state: Bool) {
      if let discoveredPeripheral, let discoveredStateCharacteristic {
         discoveredPeripheral.writeValue(Data([state ? 1 : 0]),
                                          for: discoveredStateCharacteristic,
                                          type: .withResponse)
      }
   }
}
That's it. readValue will request the peripheral to send it's value. The data is received through the didUpdateValueFor delegate method implemented above.
💡 Note: The current state can be any data, even a JSON object encoded, but for simplicity, I've decided to represent the state as a bit
Since this flow is a bit more complex, let's recap how data flows with this image:
Peripheral
Now, let's implement the second application that is acting like the peripheral. Similarly to the central example, we start with a bluetooth manager that inherits the NSObject class and defines a couple of properties for later use
class BluetoothManager: NSObject {
   // 1.
   var peripheralManager: CBPeripheralManager!
   // 2.
   let serviceUUID = CBUUID(string: "0000FFF0-0000-1000-8000-00805F9B34FB")
   let temperatureCharactersticsUUID = CBUUID(string: "0000FFF1-0000-1000-8000-00805F9B34FB")
   let stateCharacteristicsUUID = CBUUID(string: "0000FFF1-0000-1000-8000-00805F9B34FC")

   // 3.
   var state: Bool = false

   // 4.
   override init() {
      super.init()
      peripheralManager = CBPeripheralManager(delegate: self, queue: nil)
   }
}
- Instead of a central manager, we have a peripheral manager now
- As I've said before, need to use the same service and characteristics IDs
- We are only keeping the on-off state for now.
- Initialization as before
For this example, the only protocol we need to conform to is the CBPeripheralManagerDelegate
extension BluetoothManager: CBPeripheralManagerDelegate {
   // ...
}
Similarly to the central example, the first method we implement is the peripheralManagerDidUpdateState. It's function is the same as before.
We can start setting up our peripheral as soon as we know that it's available.
func peripheralManagerDidUpdateState(_ peripheral: CBPeripheralManager) {
   if peripheral.state == .poweredOn {
      let temperatureCharacteristic = CBMutableCharacteristic(type: temperatureCharactersticsUUID,
                                                               properties: [.notify, .read, .write],
                                                               value: nil,
                                                               permissions: [.readable, .writeable])
      let stateCharacteristic = CBMutableCharacteristic(type: stateCharacteristicsUUID,
                                                         properties: [.notify, .read, .write],
                                                         value: nil,
                                                         permissions: [.readable, .writeable])

      let service = CBMutableService(type: serviceUUID, primary: true)
      service.characteristics = [temperatureCharacteristic, stateCharacteristic]

      peripheralManager.add(service)
      peripheralManager.startAdvertising([CBAdvertisementDataServiceUUIDsKey: [serviceUUID]])
   }
}
As you can see, we initialize a service with two characteristics, then start advertising it for other devices.
💡 Note: The dictionary passed to
startAdvertisingcan contain an other key,CBAdvertisementDataLocalNameKey, which can be used to provide additional information that the central will receive, as mentioned before.
Opposed to the central manager, we don't have to handle connections, all we need for this example is to handle read and write requests
func peripheralManager(_ peripheral: CBPeripheralManager, didReceiveRead request: CBATTRequest) {
   if request.characteristic.uuid == temperatureCharactersticsUUID {
      let degrees = Int.random(in: 10...30)
      if let value = "\(degrees)°".data(using: .utf8) {
            request.value = value
            peripheralManager.respond(to: request, withResult: .success)
      }
   }
}

func peripheralManager(_ peripheral: CBPeripheralManager, didReceiveWrite requests: [CBATTRequest]) {
   for request in requests {
      if request.characteristic.uuid == stateCharacteristicsUUID {
            if let value = request.value, let bit = value.first {
               state = bit == 1
            }
            peripheralManager.respond(to: request, withResult: .success)
      }
   }
}
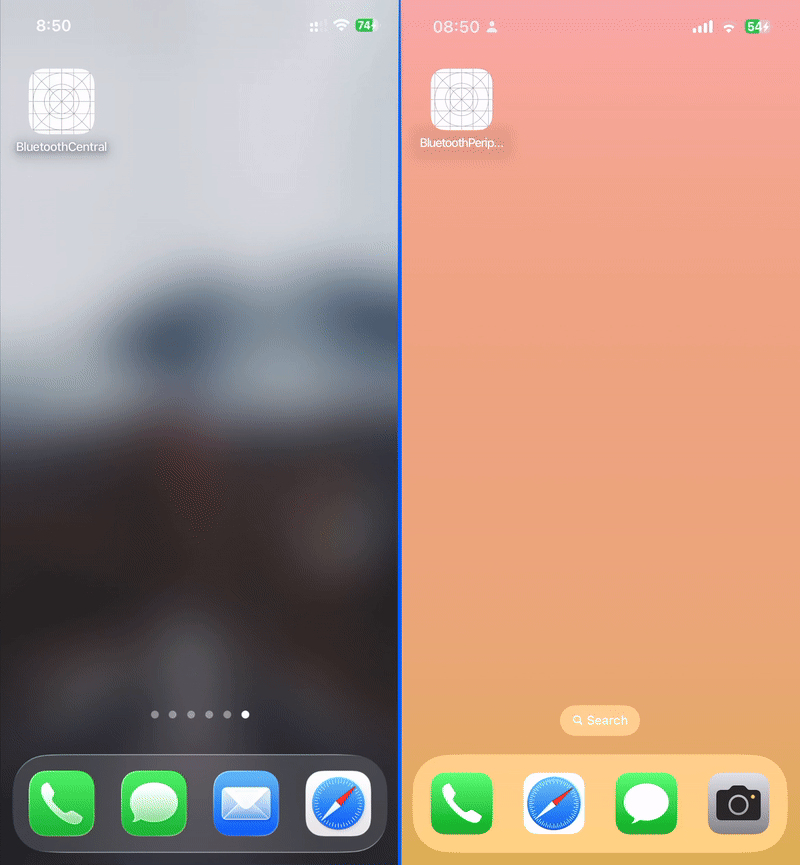
That's all we need for this example to work. If you run these two examples on real devices, you will see something similar to the example below.
💡 Note: If you need to send value updates to the connected centrals without the need for it to request the value, all you have to do is to implement the
peripheralManager(_ peripheral:, central:, didSubscribeTo:)method. Store the reference to the central then callperipheralManager.updateValue(_, for:, onSubscribedCentrals:)whenever an update is needed. It's a good practice to also implementperipheralManager(_ peripheral:, central:, didUnsubscribeFrom:)just to clean up resources when they are no longer needed.
Conclusion
CoreBluetooth makes it possible to build robust Bluetooth Low Energy experiences on iOS, whether you’re connecting to sensors, wearables, or other smart devices.
By understanding the roles of central and peripheral, and how services and characteristics structure your data, you can create apps that communicate reliably and efficiently. With the example provided, you now have a foundation for implementing both sides of BLE communication in Swift. As you explore further, you’ll find even more ways to leverage Bluetooth for innovative app features and seamless device integration.
Related articles
Here are some more articles that may interest you. Check them out!
The TimelineView
published on November 2, 2025
SwiftUILearn how to use SwiftUI’s TimelineView to build time‑based animations. This article explains scheduler options, shows practical examples (pauseable clock, smooth minute‑progress ring with hue shifts and tick marks), and helps you choose the right schedule for smooth or precise updates.
Read moreFoundation Models
published on October 8, 2025
SwiftAILearn how to use Apple’s foundation models to run large language models locally on iOS. This article covers chat, streaming responses, structured data generation, and custom tools, helping you build secure and responsive AI features without relying on the cloud.
Read moreMatched Transitions in SwiftUI
published on September 23, 2025
SwiftSwiftUIAnimationsLearn how to use matchedGeometryEffect and navigationTransition in SwiftUI to create smooth, visually engaging transitions between views and screens. This article covers practical examples for synchronizing view geometry and implementing the new zoom navigation transition, helping you build more dynamic and polished UIs.
Read more